
Repairing a Black Walnut Dog Bed: A Joint Reinforcement Workshop
Learn how to repair and reinforce broken castle joints on a black walnut dog bed. This workshop covers diagnosing joint failure, step-by-step repair techniques, and crucial woodworking tips for building stronger, more durable furniture.
Workshop Overview: Fixing Broken Castle Joints
Welcome to this workshop on repairing a common woodworking mistake: broken castle joints. We'll be focusing on a black walnut dog bed that failed due to structural issues, but the principles apply to many projects.
You'll learn:
- How to identify why castle joints fail
- A step-by-step process for repairing and reinforcing them
- Critical tips for building stronger joints in your future projects
The Original Design & Its Flaw
This dog bed was modeled after a product from Thuma, originally made from rubberwood. I opted for more expensive black walnut, which, while beautiful, didn't prevent a critical structural failure.
The main issue arose from the castle joints used to connect the frame pieces. Despite their traditional strength, a fundamental mistake in construction led to their breakage.
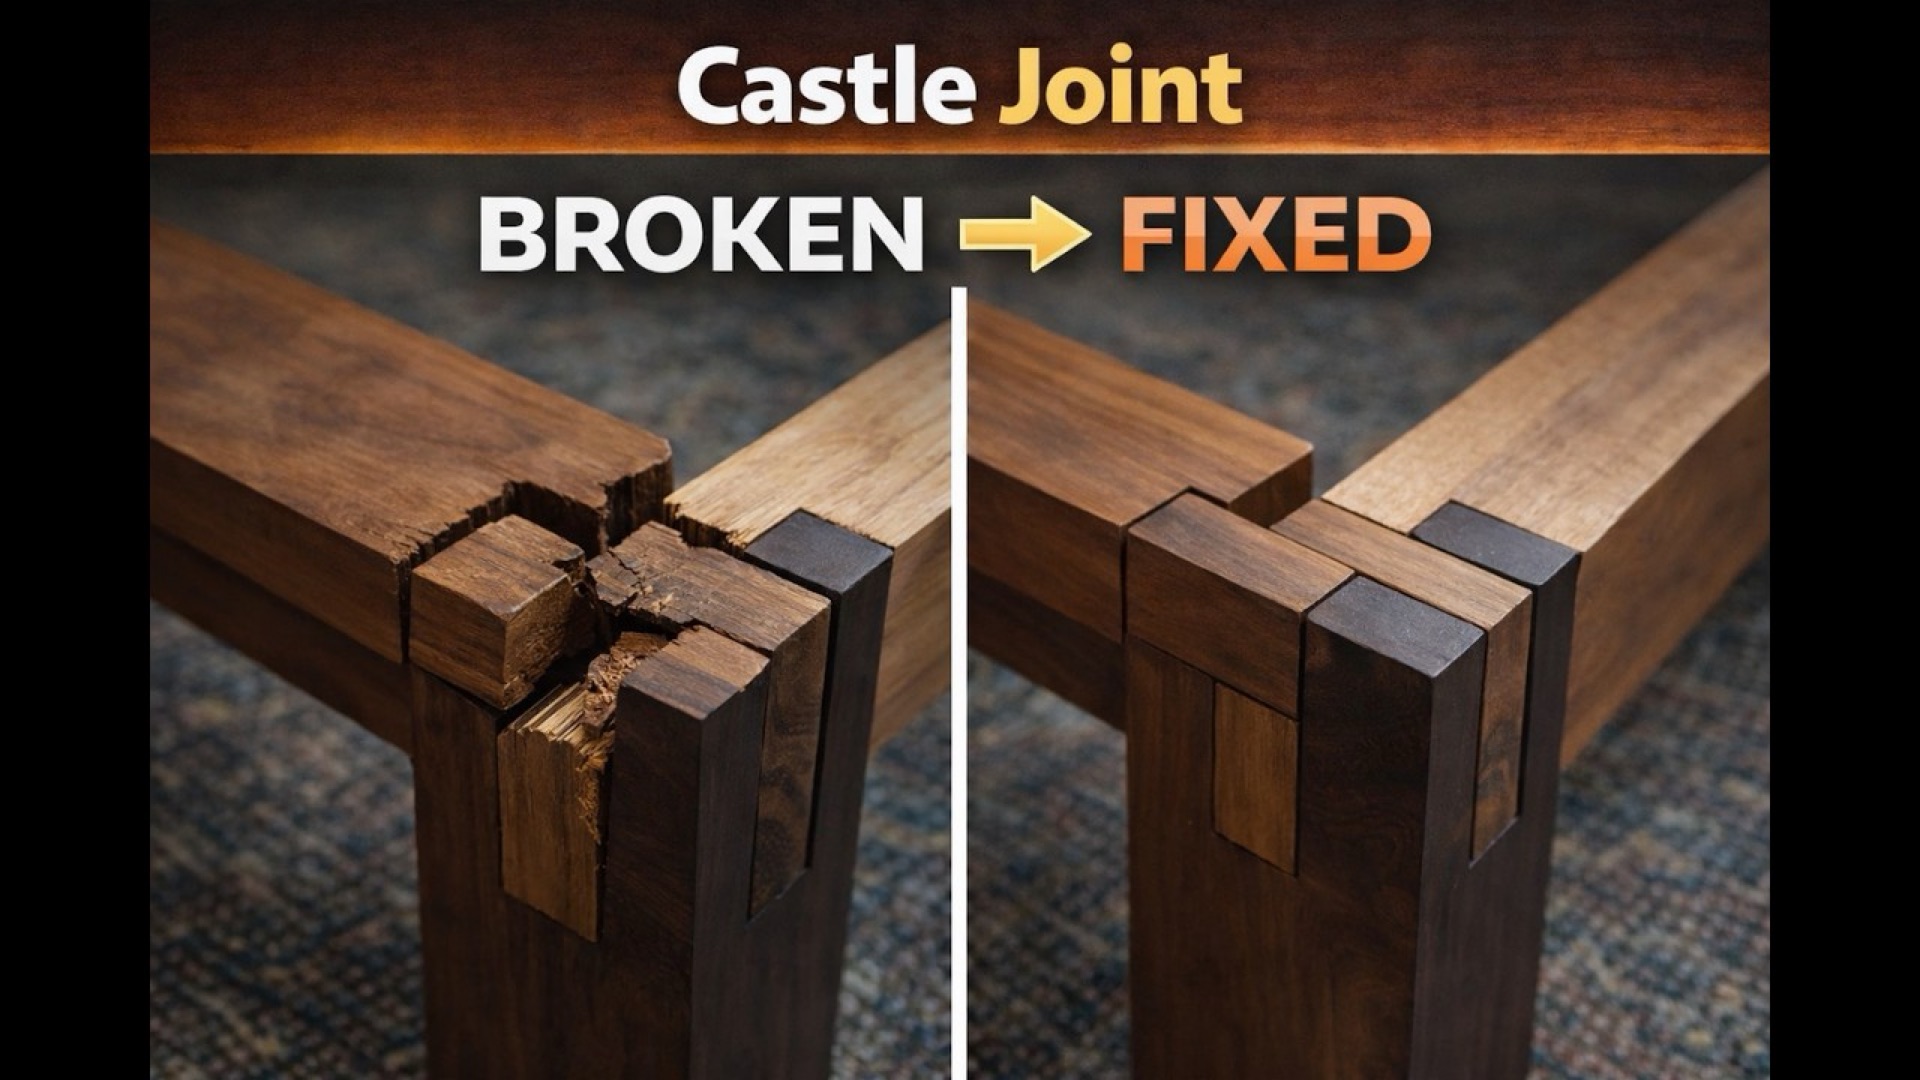
Diagnosing the Breakage
The castle joints broke off at the 'arms' or 'stubs' that extend from the main pieces. Visually, a properly constructed castle joint should have a robust interlock, but mine failed dramatically.
The key to understanding the failure lies in the wood grain direction. When the grain runs horizontally across these extending arms, it creates a significant weak point, allowing them to snap easily under stress.
Critical Woodworking Tip: Grain Direction is Key!For maximum strength in castle joints, ensure the wood grain runs vertically through the extending arms. This orientation provides much greater resistance to snapping and ensures a durable joint.
If I were to rebuild these specific pieces, I would definitely reorient the grain to prevent future failures.
Repair Step 1: Re-gluing Broken Pieces
The first step in our repair process is to reattach the broken pieces. This requires extreme precision to ensure proper alignment.
- Carefully apply wood glue to the broken surfaces.
- Position the pieces exactly as they were before the break.
- Clamp them securely, ensuring they do not shift while the glue dries.
Any misalignment here will cause issues in subsequent steps and prevent the parts from fitting correctly.
Repair Step 2: Notching for Reinforcement
Once the initial glue-up is dry, the next step is to add reinforcement. This involves cutting a notch into each joint and inserting a new piece of scrap wood.
The crucial part of this step is to ensure the grain of the new scrap wood runs perpendicular (opposite) to the existing grain of the joint. This cross-grain reinforcement significantly increases the joint's overall strength and prevents future breaks.
Repair Step 3: Flush Trimming and Cleanup
After the reinforcement pieces are glued in and dried, you'll have excess wood sticking out. This needs to be made flush.
- Use a router with a flush trim bit to carefully remove the protruding material, making the surface smooth and even.
- Because routers leave a slight curve in corners, use a sharp chisel to square up and clean out any remaining rounded edges.
This ensures a clean, professional finish and proper fit for the assembled bed.
Test Fit and Finishing Touches
With the repairs completed, perform a test fit to ensure all pieces align correctly. You'll now see the reinforced joints, ready to withstand future use.
While the structural repair is done, the project isn't truly finished. Remaining steps include:
- Thorough sanding to smooth all surfaces.
- Filling any minor gaps with wood filler.
- Applying your desired wood finish to protect and beautify the walnut.
Key Takeaway: Consistency in Sizing
One important lesson learned during this repair was the impact of inconsistent piece sizing. When the original bed was built, not all components were exactly the same size. This meant that during the repair, getting precise measurements for the new reinforcement pieces was challenging, leading to a few minor gaps.
Always strive for exact, consistent measurements when cutting your initial project components. This attention to detail will save you significant time and effort during assembly and finishing, ensuring a perfect fit every time.